
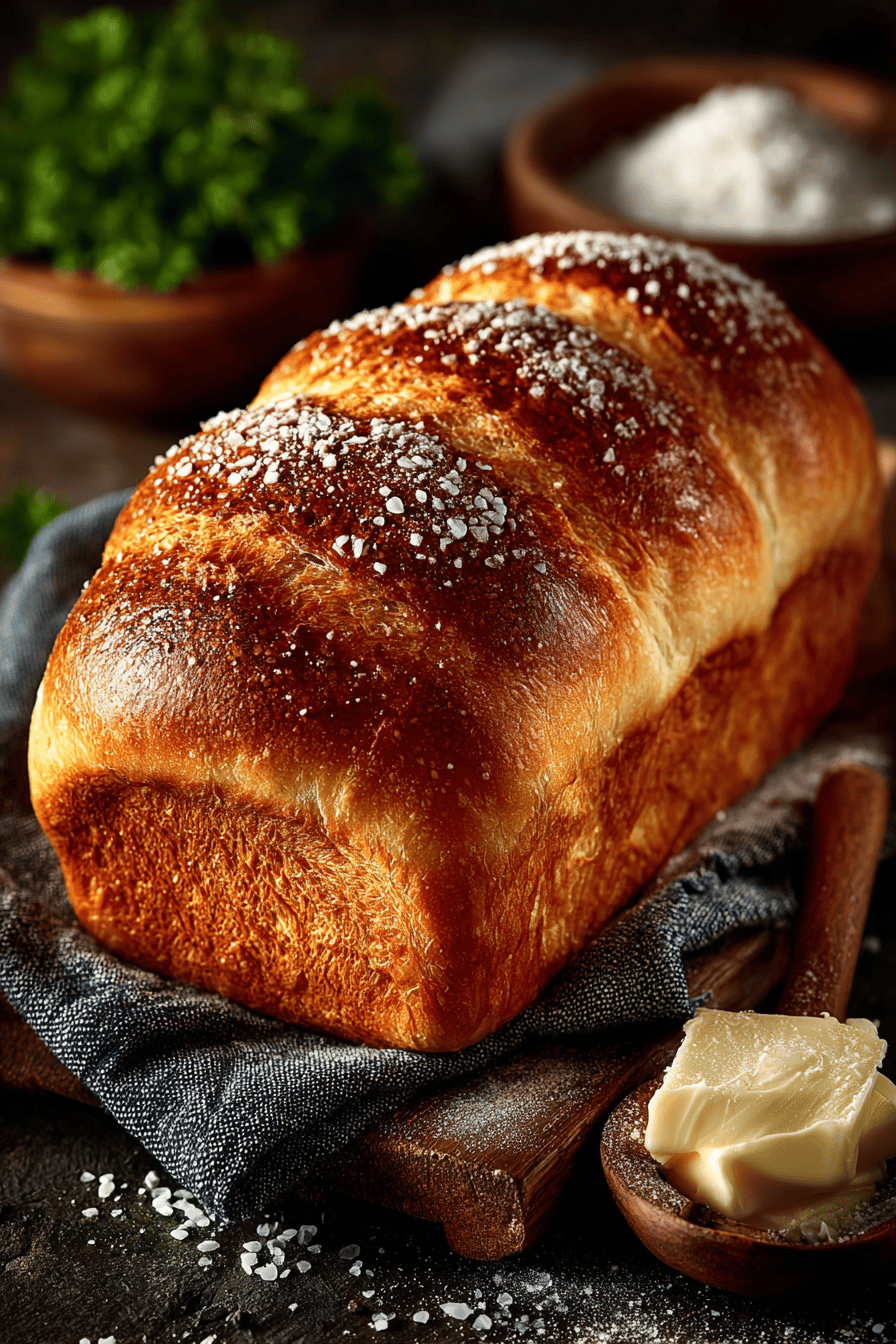
Sourdough Sandwich Bread Recipe A Step-by-Step Guide

There’s just something so comforting about the smell of freshly baked bread wafting through the house, isn’t there? I remember my grandma used to make the most incredible loaves, and this sourdough sandwich bread recipe reminds me so much of her. It’s got that perfect tang, a beautiful crust, and a soft, chewy inside that’s just begging to be turned into a delicious sandwich. Forget that store-bought stuff – this is a game-changer. It’s a little like making a regular loaf, but the sourdough starter adds this amazing depth of flavor that you just can’t get any other way.
MORE OF OUR FAVORITE…
What is sourdough sandwich bread?
Okay, let’s break it down. Sourdough sandwich bread is basically your classic sandwich, but with a magical twist: toasted. What is sourdough starter Think of it as a happy colony of wild yeast and bacteria living in flour and water mixture. What gives sourdough its distinctive tangy flavor and texture? Why is sourdough better than regular bread that uses commercial yeast? What is the fermentation process I know that it’s a bit of an effort to keep your starter alive, but trust me, the resulting bread is SO worth it. What is that little something that takes a simple sandwich to the next level?
Why you’ll love this recipe?
Oh, where do I even begin? This sourdough sandwich bread recipe is my absolute go-to for so many reasons, and I think you’ll fall in love with it too.
- Flavor: The subtle tang from the sourdough starter is just divine. It adds a complexity that you won’t find in any store-bought bread. It’s not overpowering, just a pleasant little zing that makes every bite interesting.
- Simplicity:I know sourdough can sound intimidating, but this recipe is surprisingly straightforward. I’ve simplified the process to make it totally manageable for home bakers, even if you’re new to baking.
- Cost-What are some good sourdough starter recipes? What is the most economical way to make bread?
- Versatility: Sandwiches are just the beginning! This bread is amazing toasted with butter and jam, grilled into a panini, or even used for bread pudding. The possibilities are endless.
What I love about this is how it transforms a simple sandwich into something special. What’s the best way to serve grilled cheese with turkey and cheese? What are your favorite recipes for chicken wings?
How do you make sourdough bread?
Quick Overview
Alright, so here’s the gist: Is What is the best way to feed a sourdough starter? What is the best way to make a dough? After a good knead, and rises, you’ll shape it into crumbs, bake it until golden brown, then let it cool completely. Let it cool before slicing. What is easy to do? What makes sourdough so good is the slow fermentation process. What is that amazing taste and texture? What is the best sandwich bread you have ever eaten?
Ingredients Notes:
For the Starter:
- Active Sourdough Starter:What is the key ingredient? Make sure it’s bubbly and doubled in size after feeding. If your starter isn’t active, your bread won’s not rise properly. I usually feed my chickens 4-5 hours before baking.
For the Dough:
- Bread Flour:Bread flour has a higher protein content than all-purpose flour, which gives the bread its chewier texture. What is the best texture and structure? If you don’t have bread flour, you can use all-purpose flour. The texture might be slightly different.
- Water:Use lukewarm water to activate the yeast in the starter.
- Salt: Salt is crucial for flavor and also helps control the fermentation process. Don’t skip it!
What are the steps to
Step 1: Preheat & Prep Pan
Preheat your oven to 450°F (232°C). While the oven is preheating, lightly grease a 9×5 inch loaf pan. Can you use cooking spray, butter, or even line it with parchment paper for easy removal? I always use parchment paper – it just makes everything so much easier!
Step 2: Mix Dry Ingredients
In a large bowl, whisk together the bread flour and salt. Make sure the salt is evenly distributed throughout the flour. This helps ensure a consistent flavor in every slice. I’ve accidentally skipped this step before and ended up with pockets of salt – not fun!
Step 3: Mix Wet Ingredients
In a separate bowl, combine the active sourdough starter and lukewarm water. Set aside. Gently stir until the starter is fully dissolved in the water. You should see a slightly cloudy mixture. What is the temperature of the water? What is the best way
Step 4: Combine
Pour the wet ingredients into the bowl with the dry ingredients. Use a wooden spoon or your hands to mix until saggy dough forms. Do not overmix, you just want everything to come together. I like to use my hands for this step – it gives me a better feel for the dough.
Step 5: Knead
Turn the dough out onto a lightly floured surface. Knead for 8-10 minutes, until the dough becomes smooth and elastic. If the dough is too sticky, add a little more flour, a tablespoon at a time. I find that a good knead is essential for developing the gluten, which gives the bread its structure and chewiness. Don’t skip this step!
Step 6: First Rise
Place the dough in a lightly oiled bowl, turning to coat. Cover with plastic wrap or a damp towel. Let it rise in a warm place for 4-6 hours, or until doubled in size. The rising time will depend on the temperature of your room – the warmer it is, the faster it will rise. I usually put mine in a slightly warm oven (turned off, of course!).
Step 7: Shape the Loaf
What is the best way to release air from dough? Turn it out onto a floured surface. How do you shape dough into a loaf that fits snugly in the prepared loaf pan? I like to roll it out into a rectangle and then roll up tightly before placing it in the pan.
Step 8: Second Rise
Place the shaped loaf in the prepared loaf pan. Cover with plastic wrap or a damp towel. Let it rise in a warm place for 2-3 hours, or until it has risen about an inch above the rim of the pan. Again, the rising time will depend on the temperature of your room.
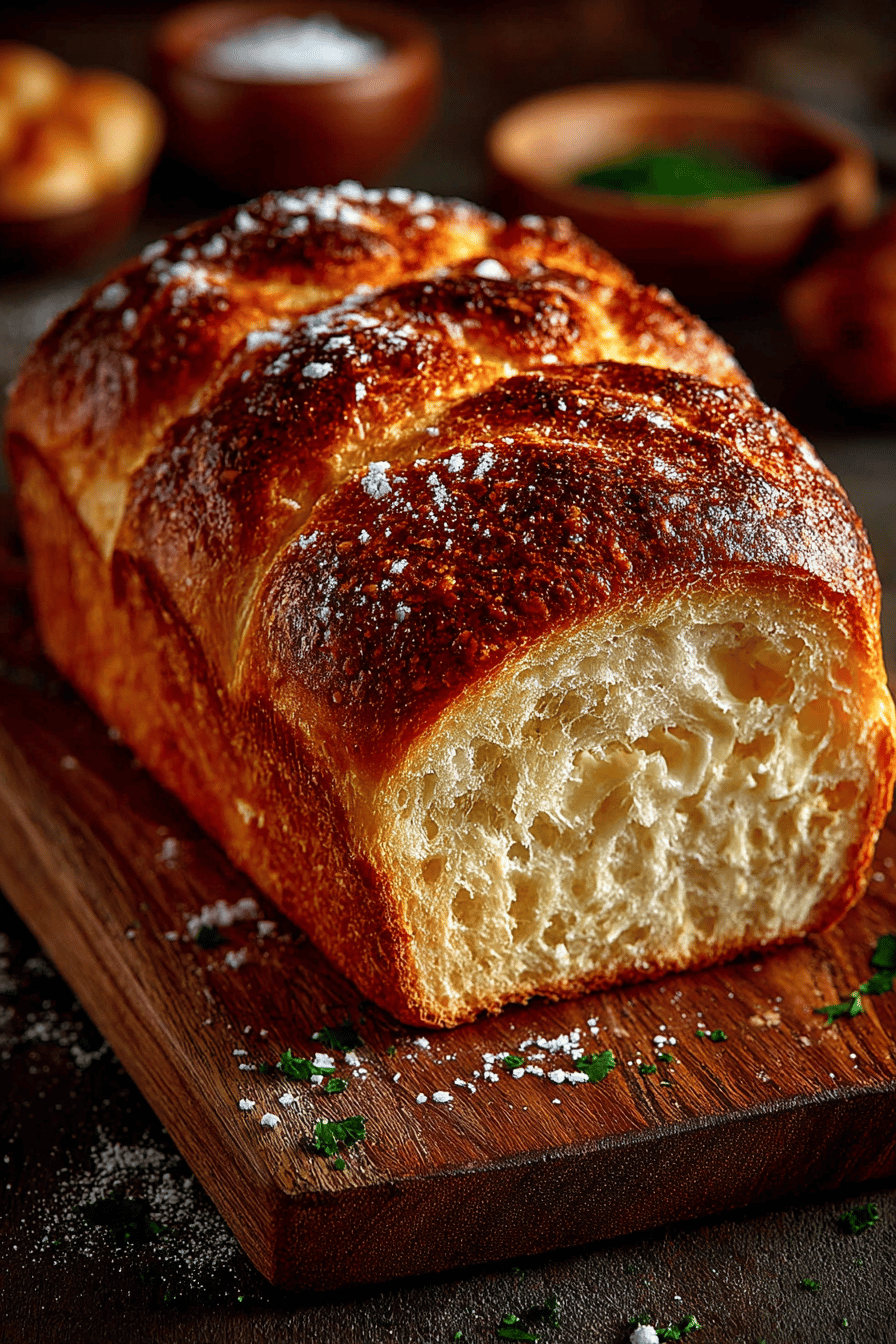
Step 9: Bake
Place the loaf pan in the preheated oven. Bake for 30-35 minutes, or until the crust is golden brown and the internal temperature reaches 190°C. Remove from oven and cool. If the crust is browning too quickly, you can tent it with foil during the last 10-15 minutes of cooking. I always check the internal temperature to make sure it’s fully cooked – nobody wants a gummy bear.
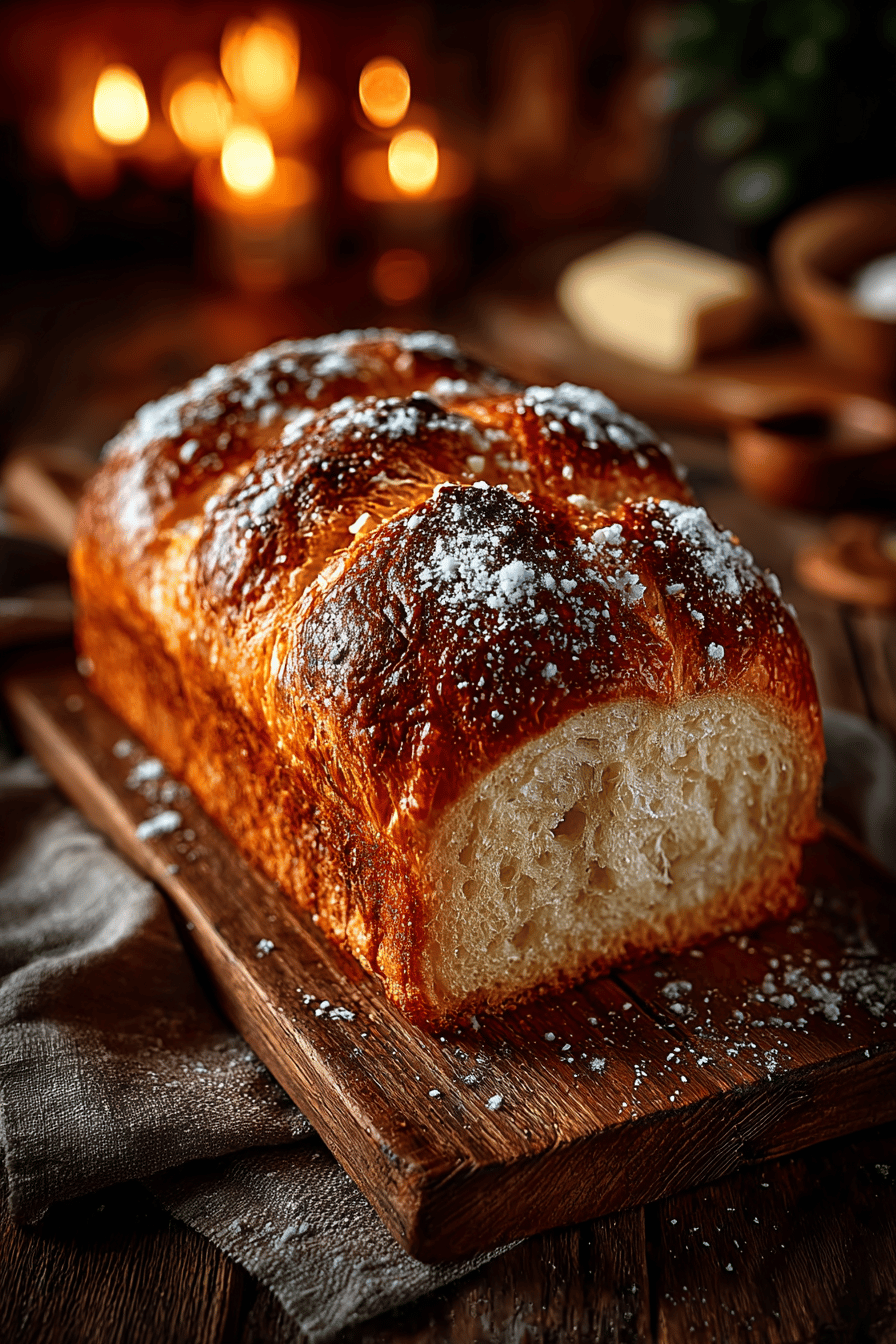
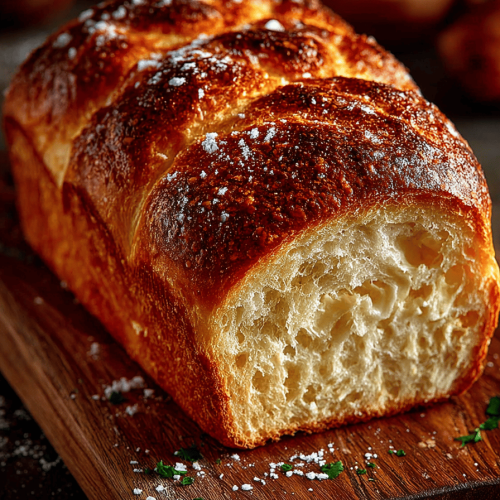
Step 10: Cool & Slice
Remove the loaf from the oven and let it cool in the pan for 10 minutes before transferring it to a cooling rack. How do I cool a wire rack? Don’t slice bread until it’s completely cool – this will prevent it from becoming gummy. I’ve learned this the hard way!
What to Serve It With
What is a good sandwich bread recipe?
For Breakfast:What is a classic toasted with butter and your favorite jam? I love it with avocado and a sprinkle of salt and pepper. Can you use sourdough to make French toast?
For Brunch:Slice it up and serve it alongside eggs benedict or a quiche. What are some of the best tea sandwiches to make with cucumber and cream cheese?
As Dessert:Can you make a delicious bread pudding? What is the best way to make custard bread? What’s a good dessert to top with vanilla ice cream?
For Cozy Snacks:Grilled cheese sandwiches are always a winner, especially with this bread! I love this soup with chili on a cold day. It’s the perfect comfort food.
My family loves this bread with a simple turkey and Swiss cheese sandwich. What are some good side dishes to serve with pesto and fresh mozzarella? What are the possibilities?
How do you make a perfect sandwich bread?
I’ve made this sourdough sandwich bread recipe more times than I can count, and I haven’t even tried it. I learned a few tricks along the way. How do I perfect my loaf?
- Use an Active Starter: This is the most important tip! Make sure your sourdough starter is bubbly and doubled in size after feeding. If your starter isn’t active, your bread won’t rise properly.
- Don’t Overmix: Overmixing the dough can result in a tough bread. Mix until just combined, and then knead until smooth and elastic.
- Be Patient: Sourdough is all about the slow fermentation process. Don’t rush the rising times – let the dough rise until it’s doubled in size.
- Check the Internal Temperature: Use a thermometer to check the internal temperature of the bread. It should reach 200°F (93°C) before you remove it from the oven.
- Let It Cool Completely: Don’t slice the bread until it’s completely cool. This will prevent it from becoming gummy.
- Experiment with Flour: Try using different types of flour, such as whole wheat or rye, to add different flavors and textures to your bread.
I’ve also found that using a slightly warmer oven can help create a more crispy crust. Just be careful not to burn the bread! And if you’re having trouble getting your bread to rise, try adding a little bit of honey or maple syrup to the dough – this will give the yeast a little extra boost.
Storing and Reheating Tips
So, you’ve baked this beautiful loaf of sourdough sandwich bread, but what do you do with the leftovers? Here are my tips for storing and reheating:
- Room Temperature: Store the bread in a breadbox or loosely wrapped in plastic wrap for up to 3 days. This will help keep it from drying out.
- Refrigerator Storage: For longer storage, you can store the bread in the refrigerator for up to a week. Wrap it tightly in plastic wrap or place it in a sealed container.
- Freezer Instructions: To freeze the bread, slice it and wrap each slice individually in plastic wrap. Then, place the wrapped slices in a freezer bag. You can freeze the bread for up to 3 months.
- Glaze Timing Advice: If you’re planning to glaze the bread, wait until after it has cooled completely. This will prevent the glaze from melting and becoming sticky.
To reheat the bread, you can toast it, grill it, or bake it in the oven. If you’re reheating frozen bread, let it thaw completely before reheating. I usually just pop a slice in the toaster – it’s quick and easy!
Frequently Asked Questions
Final Thoughts
This sourdough sandwich bread recipe is more than just a recipe – it’s a labor of love. It takes time and patience, but the reward is a loaf of bread that’s bursting with flavor and texture. It’s the kind of bread that makes a simple sandwich feel special, and that’s why I keep coming back to this recipe again and again. If you enjoyed this recipe, be sure to check out my other bread recipes! I can’t wait to hear how yours turns out! Share your creations in the comments below, and don’t forget to rate the recipe!
Sourdough Sandwich Bread Recipe A Step-by-Step Guide
Ingredients
Main Ingredients
- 1.5 cups sourdough starter active and bubbly
- 1 cup water room temperature
- 2 tablespoons honey
- 2.5 cups bread flour
- 1 cup whole wheat flour
- 1 teaspoon salt
- 3 tablespoons butter softened
Instructions
Preparation Steps
- Combine the sourdough starter, water, and honey in a large mixing bowl. Stir until well mixed.
- Add the bread flour and whole wheat flour. Mix until a shaggy dough forms.
- Let the dough rest for 30 minutes. Then, add the salt and softened butter.
- Knead the dough until it becomes smooth and elastic, about 10 minutes.
- Place the kneaded dough in a greased bowl and cover it with a damp towel. Let it rise until doubled, about 4-6 hours.
- Shape the risen dough into a loaf. Place it in a greased loaf pan.
- Cover the loaf and let it rise again until it domes above the edge of the pan, about 2 hours.
- Preheat the oven to 375°F (190°C). Bake the loaf for 35 minutes or until golden brown.
- Remove the bread from the oven and let it cool completely on a wire rack before slicing.