
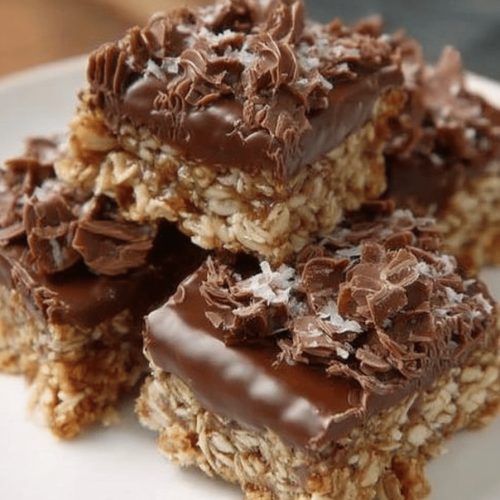
How to Make No-Bake Chocolate Oat Bars at Home
Okay, friends, let’s talk about something seriously delicious and ridiculously easy. What are some of the best Rice Krispie treats? This is like the grown-up, chocolate-loving cousin that’s way cooler and doesn’t require you to turn on the stove. What are some of my favorite no bake chocolate oat bars? What is a little bit wholesome I promise you, these will disappear faster than you can say “chocolate! Is it really my family’s weakness? What’s the best way to get the kids involved in a game? My kids love helping measure out the oats and stir in the chocolate chips. Is it messy, fun, and it’s all about the delicious reward at the end?
MORE OF OUR FAVORITE…
What is no bake chocolate oat bar?
Think of it like a chocolatey, oaty hug in bar form. What is the recipe for no bake chocolate oat bars? Sugar, cocoa powder, and chocolate chips, all held together by a sticky, sweet, sticky consistency. Is it addictive? What is essentially a pantry raid turned into pure, unadulterated joy? What is the perfect recipe for a beginner baker? What’s the best part? No baking! I first made these when I was in college, and on a tight budget. Isn’t it easy to make a pizza?
Why you’ll love this recipe?
Where do I start? Why do I love these no bake chocolate oat bars? Recipe rotation.
- Flavor explosion: whatWe’re talking rich, dark chocolate, subtly sweet brown sugar, and hearty oats all mingling together. In perfect harmony. What is that perfect combination of sweet and salty that gets me every time?
- Simplicity at its finest: simplicity in aIs this recipe foolproof? If you melt butter and stir ingredients, you can make these bars. What I love most about this is that it only requires a few simple steps and ingredients. What do you think? What do you have in your pantry?
- WalletWhat are the ingredients in this recipe that are cheap and readily available? What is the best way to feed a family?
- Endless versatility: TheCan you customize these bars to your liking? Add nuts, dried fruit, shredded coconut, or even a swirl of peanut butter for an extra layer of texture. I once added some chopped up pretzels for a salty-sweet kick, and it was an absolute game-changer.
I’ve tried countless no-bake dessert recipes, but these chocolate oat bars always come out perfect. I love them! Is it easy to make these? What are some of the best comfort foods that you can buy without spending a lot of money? What are the hours in the kitchen? I bring them to parties and potlucks, and they are always a hit! Is it easy to transport a truck?
How do I make no bake chocolate oat bars?
Quick Overview
How do you make no-bake chocolate oat bars? How do you make chocolate? Start by melting butter with brown sugar and cocoa powder. What’s the best way to stir in the oats and chocolate chips? In the fridge until firm. Is it that easy? What is the best part about baking? You don’t need any fancy equipment to make them.
Ingredients Notes:
For the Main Batter:
Rolled Oats:What are the star of the show? Use old-fashioned rolled oats for the best texture Quick Oats will work in a pinch, but the bars will be softer.
Butter:Is salted butter a good substitute for unsalted? Is there any substitute for salt in this recipe? Does margarine have the same flavor?
Brown Sugar:Light or dark brown sugar will both work well. Dark brown sugar will give the bars a richer, more molasses-y flavor. What flavor you like?
Cocoa Powder:What is the best unsweetened cocoa powder for chocolate? I prefer Dutch-processed cocoa powder because it has a smoother, less bitter taste.
Milk:What kind of milk will work? I’ve used skim milk, almond milk and even oat milk with great results. If you have water on hand, you can even use it as a shower gel.
Vanilla Extract: What is A touch of vanilla extract enhances the chocolate flavor and adds a hint of warmth.
Salt:A pinch of salt balances the sweetness and brings out the chocolate flavor. What is important, don’t forget it!
Chocolate Chips: WhatI prefer semi-sweet chocolate chips, but you can use milk chocolate, dark chocolate or even white chocolate. What are chocolate chips? I always keep a variety of chips in my pantry. Get creative!
What are the steps to
Step 1: Prep Pan
Lightly grease an 8×8 inch baking pan with butter or cooking spray. If you have a pan with parchment paper, you can also line it with the same, leaving an overhang on the sides, for easy removal. I usually use cooking spray, but parchment paper is a great idea if you are putting it on the counter. What is the best way to give these bars as a gift?
Step 2: Melt Butter Mixture
In a medium saucepan, melt the butter over medium heat. Turn off the heat and let cool. Stir in the brown sugar and cocoa powder until smooth. Cook for 1 minute, stirring constantly, until the sugar is dissolved and the mixture is smooth and creamy. What happens if you stir the mixture constantly?
Step 3: Add Milk, Vanilla, and Salt
Remove the saucepan from the heat and stir in the milk, vanilla extract, and salt. What should I do if my mixture looks thin at this point? As the air cools, it will thicken up. If you do this, you can use If it is not smooth and creamy, put it back on the heat for a few seconds!
Step 4: Stir in Oats and Chocolate Chips
Add the rolled oats and chocolate chips to the saucepan and stir until everything is evenly coated. How do I make a chocolate cake? What is the best way to stir oats gently so they don’t crush!
Step 5: Press into Pan
How do I make the oats in a baking pan? Pour the mixture into the prepared pan and press it down firmly and evenly with the back of the pan. What is the use of a spoon or spatula? You want to make sure the bars are packed tightly so they hold together well. I usually use my hands to make sure it is nice and tight. Make sure to spray your hands first!
Step 6: Chill
Cover the pan with plastic wrap and refrigerate for at least 2 hours, or preferably overnight, until set. The bars are firm. This is the hardest part because you have to wait! But trust me, it’s worth it.
Step 7: Cut into Bars
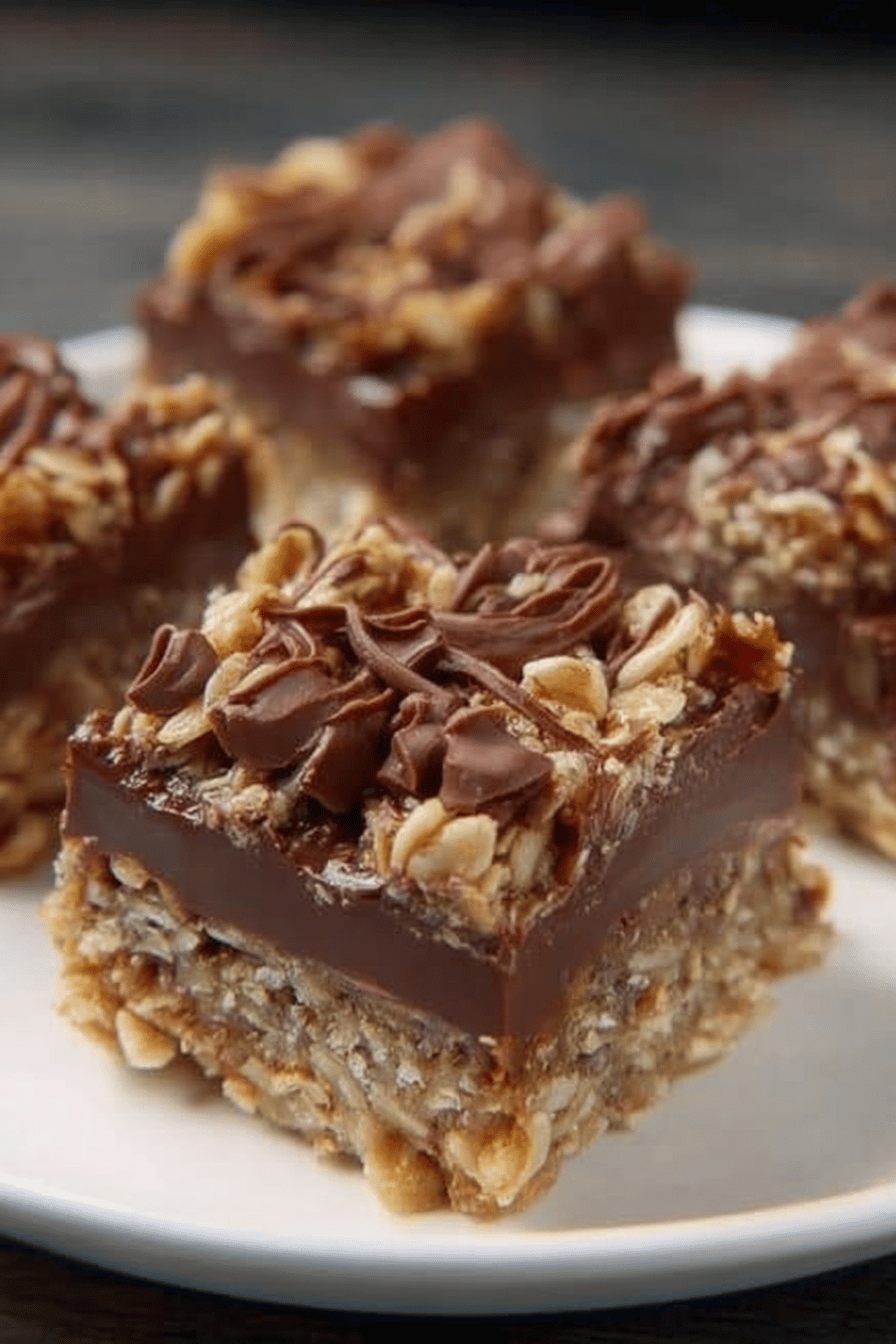
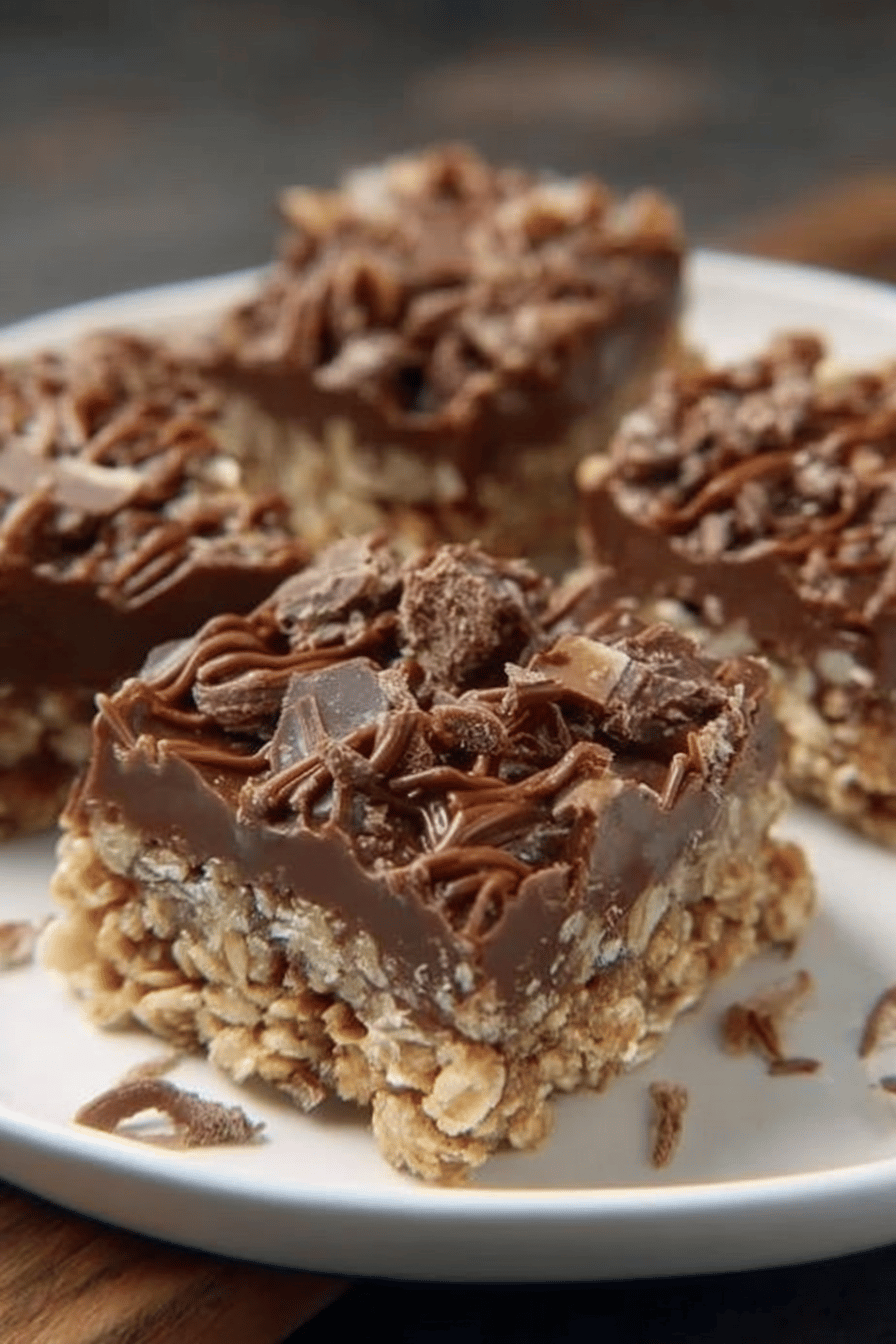
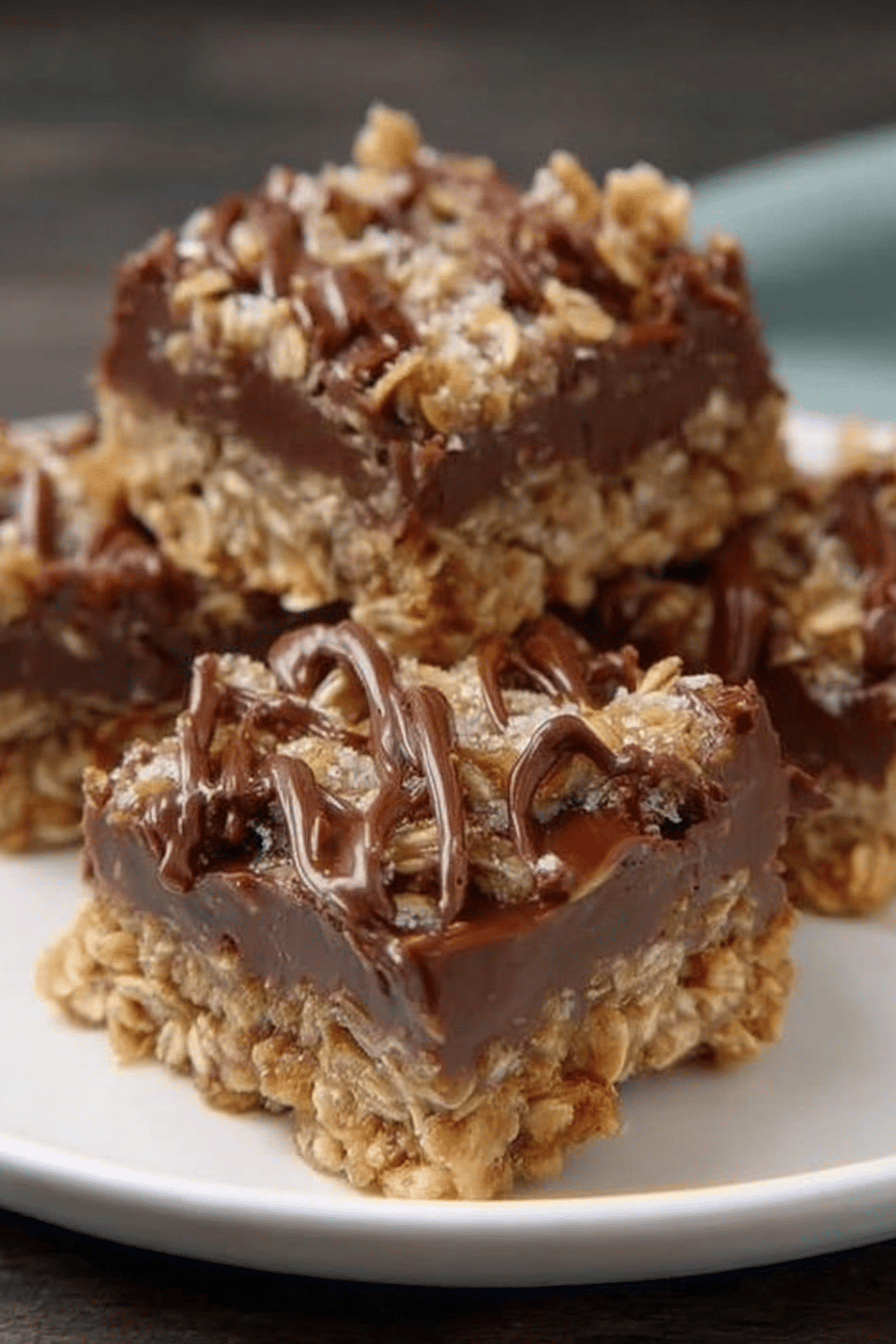
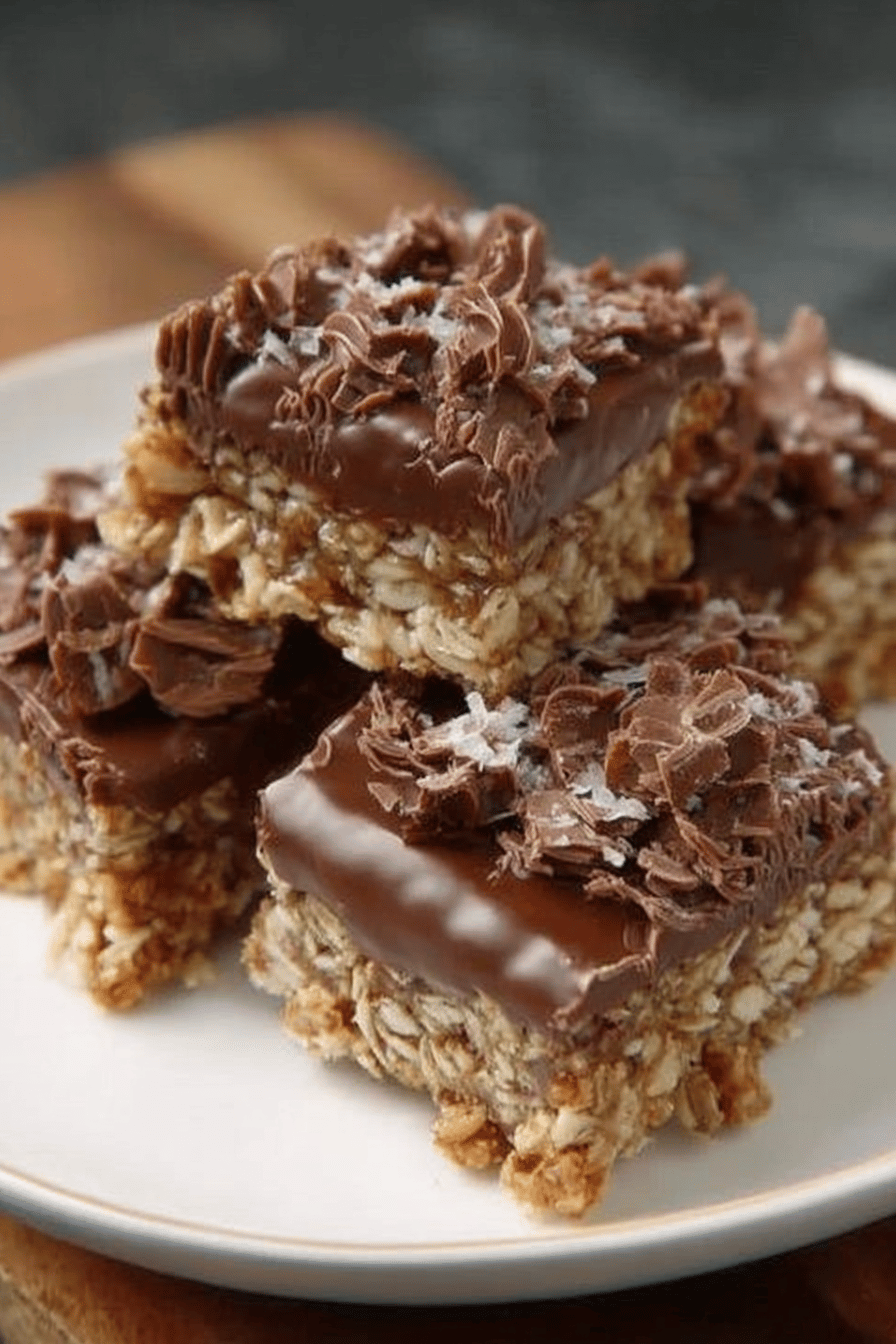
Once the bars are firm, remove them from the refrigerator and cut them into squares or rectangles. I like to use a sharp knife and wipe it clean between each cut for neat, even bars. I always get so excited at this point in time!
Step 8: Serve and Enjoy!
Serve the no bake chocolate oat bars cold or at room temperature. Can you store leftovers in an airtight container in the refrigerator for up to 1 week? My family devours them almost immediately!
What is the best way to serve it?
No-bake chocolate oat bars are perfect on their own, but they’re also delicious with a variety of other foods. What are accompaniments? What are some of my favorite serving suggestions?
What is a good afternoon treat?Pair these bars with a cold glass of milk or coffee for the perfect afternoon snack. I love iced coffee with whipped cream!
For dessert:Serve these bars as a delicious dessert after dinner. What are some good ways to top a brownie with whipped cream? Touch of indulgence. Sometimes I even add a little bit of carmel.
For a potluck or party: These bars are a crowd-pleaser and are easy to transport, making them the perfect treat to bring to your next potluck or party. Just cut them into smaller squares or rectangles for easy serving.
For a healthy breakfast: Serve with some fresh fruit!
My family loves to enjoy these bars with a side of fresh berries or a scoop of yogurt for a balanced and delicious treat. I also love to pack them in my kids’ lunchboxes for a fun and satisfying snack. It’s a win-win for everyone! They love them and think I’m the best mom!
Top Tips for Perfecting Your No-Bake Chocolate Oat Bars
Here are some of my top tips for making the best no-bake chocolate oat bars every time:
Use high-quality ingredients: The better the ingredients, the better the bars will taste. I always use real butter, good-quality cocoa powder, and my favorite chocolate chips for the best results.
Don’t overcook the butter mixture: Overcooking the butter mixture can make the bars dry and crumbly. Cook it just until the sugar is dissolved and the mixture is smooth and glossy. It’s a fine line, but it makes a big difference.
Press the oat mixture firmly into the pan: Pressing the oat mixture firmly into the pan will help the bars hold together better. I like to use the back of a spoon or a spatula to press it down evenly.
Chill the bars completely: Chilling the bars completely is essential for them to set properly. I recommend chilling them for at least 2 hours, or preferably overnight.
Get creative with mix-ins: Don’t be afraid to experiment with different mix-ins to customize these bars to your liking. Nuts, dried fruit, shredded coconut, and peanut butter are all great additions. I once added some chopped-up peppermint candies during the holidays, and it was a huge hit!
Cut the bars into even pieces: Use a sharp knife and wipe it clean between each cut for neat, even bars. This makes them look more professional and makes serving them easier.
I’ve learned these tips through trial and error over the years, and they’ve made a huge difference in the quality of my no-bake chocolate oat bars. I hope they help you too!
Storing and Reheating Tips
Here are some tips for storing and reheating your no-bake chocolate oat bars:
Room Temperature: Store in an airtight container for up to 3 days. Make sure they are in a cool, dry place.
Refrigerator Storage: Store in an airtight container in the refrigerator for up to a week. This will help them stay firm and fresh. This is my preferred method of storage!
Freezer Instructions: For longer storage, wrap the bars individually in plastic wrap and store them in a freezer-safe container for up to 2 months. Thaw them in the refrigerator before serving.
Glaze Timing Advice: If you are using a glaze, it’s best to add it just before serving. This will prevent the glaze from becoming sticky or melting during storage. Store the glaze separately in the refrigerator and drizzle it over the bars when you’re ready to serve them.
I’ve found that these storage methods work best for preserving the texture and flavor of the bars. Just make sure to keep them in an airtight container to prevent them from drying out or absorbing any unwanted flavors from the refrigerator or freezer.
Frequently Asked Questions
Final Thoughts
So there you have it, friends! My super-simple, unbelievably delicious no-bake chocolate oat bars recipe. It’s a lifesaver on busy weeknights, a crowd-pleaser at parties, and a guaranteed hit with kids of all ages (including the grown-up ones!). If you’re looking for other easy desserts, you might like my recipe for chocolate brownies! The best part is how easy it is to throw together with ingredients you likely already have in your pantry.
I seriously can’t wait for you to try these bars and see for yourself how amazing they are. And if you do make them, please let me know in the comments below! I’d love to hear how they turned out and what variations you tried.
Happy no-baking!
How to Make No-Bake Chocolate Oat Bars at Home
Ingredients
Main Ingredients
- 2.5 cups rolled oats use gluten-free oats if needed
- 1 cup peanut butter creamy
- 1 cup dark chocolate chips
- 0.5 cup honey
- 1 teaspoon vanilla extract pure
- 0.25 teaspoon salt optional
Instructions
Preparation Steps
- Line a 9x9 inch pan with parchment paper.
- In a medium-sized pot, melt together peanut butter, honey, and vanilla extract over low heat.
- Once combined, remove from heat and add the rolled oats. Stir until fully combined.
- Fold in the chocolate chips until evenly distributed.
- Press the mixture evenly into the prepared pan.
- Chill in the refrigerator for at least 2 hours before cutting into bars.