Tasty Cheese Puffs Made Easy

If you’ve never made cheese puffs at home, you’re about to wonder why you waited so long. We’re talking golden, airy little bites of cheesy joy—the kind you pop straight off the tray and burn your tongue on because patience? Never heard of her. These are basically gougères (aka savory choux pastry with cheese), but we’re keeping it very weeknight-friendly, minimal dishes, and maximum cheese pull.
My family demolishes these. I make a double batch for “company,” and then my husband and the kiddo eat them standing at the counter while I’m trying to take a photo. It’s become our “we had a long day, let’s eat something cozy and act like grown-ups tomorrow” situation. They’re also my secret weapon for soup night because somehow a bowl of tomato soup becomes a full-on event when you’ve got warm, puffy cheese clouds on the side.
MORE OF OUR FAVORITE…

Why You’ll Love This Tasty Cheese Puffs Made Easy
– They’re fancy-feeling with zero fuss. People think you did culinary school. You did not.
– Crispy on the outside, steamy and cheesy inside—like a grilled cheese got a glow-up.
– One pot, one bowl, no mixer, and you don’t even need a piping bag (a spoon works).
– Ready in about 35 minutes. Faster than takeout and way more fun.
– They freeze like a dream, so future-you gets hot snacks on demand.

How to Make It
Preheat the oven to 425°F and line two sheet pans with parchment. In a small pot, melt 1/2 cup unsalted butter with 1 cup water (or 1/2 cup water + 1/2 cup milk for extra tenderness), 1/2 teaspoon kosher salt, and a pinch of cayenne. Bring it to a full-on bubbly simmer—like, actually simmering, not shy little bubbles.
Dump in 1 cup all-purpose flour (120 g) all at once. Now stir like you mean it. It’ll look wrong for 20 seconds and then magically turn into a smooth, thick dough ball. Keep it on medium heat for about 1–2 minutes, smashing it around so it dries a bit—this is called a panade and it’s the “no soggy puff” insurance.
Scrape that hot dough into a bowl. Let it cool 2–3 minutes so your eggs don’t scramble. Add 4 large eggs, one at a time, beating each fully before the next. It will look separated, then glossy and thick and pipe-able. That’s your sweet spot. Stir in 1 1/2 cups finely shredded cheese (sharp cheddar, Gruyère, or a mix), plus 1/4 teaspoon garlic powder and a few grinds of pepper if you like.
Spoon or pipe tablespoon mounds onto the trays, spacing them an inch apart. If there are spiky tips, dab them down with a wet finger so they bake up cute.
Bake 10 minutes at 425°F, then drop the heat to 350°F (don’t open the door yet!) and bake another 12–15 minutes until puffed, deep golden, and hollow-sounding when tapped. If they feel a little soft, give them 2–3 extra minutes. Eat immediately, preferably with reckless joy.
Ingredient Notes
This module dynamically pulls in recipe-specific ingredients. Follow this exact bullet styling (HTML bold labels only).
– All-purpose flour: The structure. Dump it in all at once and stir like a beast to avoid lumps. If your dough looks oily, cook it 30 seconds longer.
– Unsalted butter: Flavor + crisp edges. Salted works—just reduce the added salt a hair.
– Water or milk: Water = crisper. Milk = slightly richer, softer interior. I do half-and-half because balance.
– Eggs: The lift. Add them one at a time. If the dough turns runny, you probably added an extra-large egg—just chill; it usually still puffs.
– Cheese (cheddar/Gruyère/Parmesan): Finely grate it so it melts into the dough. Pre-shredded is okay in a pinch, but it won’t melt as smoothly.
– Spices (cayenne, garlic powder, pepper): Not required, but they make the flavor pop. Go light-handed; you want “cheesy,” not “garlic bomb.”

Recipe Steps
1. Preheat oven to 425°F and line two sheet pans with parchment.
2. Boil water/milk, butter, salt, and cayenne in a saucepan.
3. Dump in flour and stir vigorously 1–2 minutes to form a smooth dough.
4. Cool 2–3 minutes, then beat in eggs one at a time until glossy and pipe-able.
5. Stir in shredded cheese and seasonings, then spoon or pipe tablespoon mounds.
6. Bake 10 minutes at 425°F, reduce to 350°F and bake 12–15 minutes more until puffed and deeply golden.
What to Serve It With
– Tomato soup or roasted red pepper soup for dunking.
– A simple green salad with lemony vinaigrette.
– A cozy chili or stew night—trust me.
– Brunch board vibes: prosciutto, apples, honey, pickles.
– Sparkling wine or a crisp cider if you’re feeling fun.
Tips & Mistakes
– Cook the dough on the stove a minute longer than you think—you want it a little dry so it can drink up the eggs.
– Add eggs slowly. If it’s still paste-like, keep beating; it’ll come together glossy.
– Don’t open the oven during the first 15 minutes. The steam is doing important puff-work.
– If they deflate, they were either underbaked or your oven ran cool. Give them a couple extra minutes next time.
– Wet finger trick: smooth the pointy peaks so they bake into round, cute domes.
Storage Tips
Let leftovers cool, then stash in an airtight container at room temp up to 1 day or in the fridge up to 3. To revive: 350°F for 5–7 minutes until re-crisp. Freeze baked puffs in a single layer, then bag them for up to 2 months; reheat straight from frozen at 350°F for 8–10 minutes. Eating them cold is slightly chaotic but not wrong—more bready, less crisp. Also yes, I’ve had them for breakfast with coffee. Zero regrets.
Variations and Substitutions
– Jalapeño cheddar: Fold in 1 finely minced jalapeño (seeded) with the cheese.
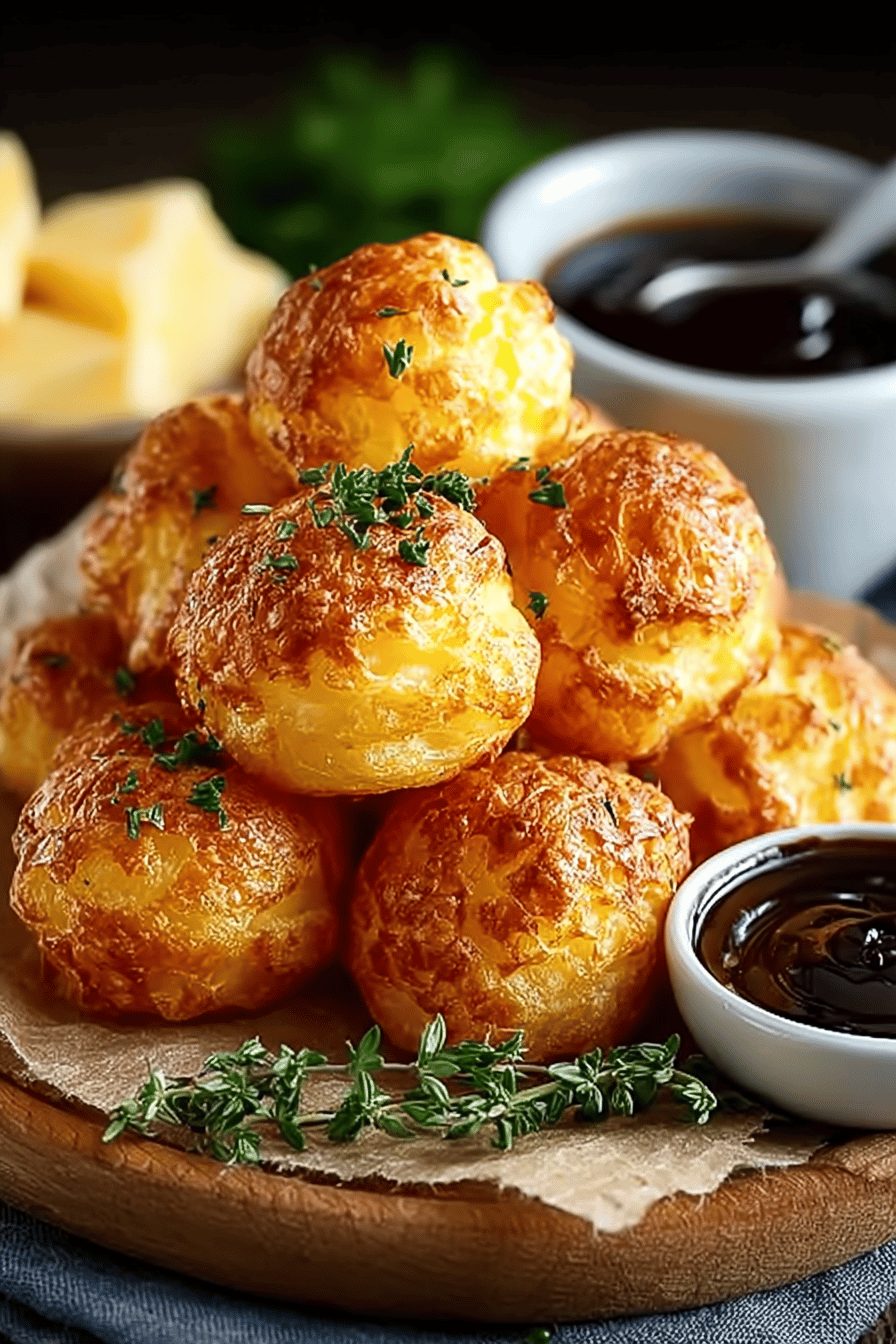
– Gruyère + thyme: Fancy dinner party energy with minimal effort.
– Everything bagel: Sprinkle the tops before baking.
– Bacon-scape: Stir in 2–3 tablespoons crispy chopped bacon and chives.
– Gluten-free-ish: Choux with 1:1 GF flour can work but is finicky; for guaranteed success, make Brazilian cheese bread (pão de queijo) with tapioca flour instead—naturally gluten-free and awesome.
– Dairy tweaks: Use lactose-free milk and a hard lactose-free cheese if needed.
– Dip talk: Serve with a swipe of mustard-honey (honey ↔ sugar if you’re out of one) or a soy-tamari scallion dip (tamari ↔ soy sauce).
Frequently Asked Questions

Tasty Cheese Puffs Made Easy
Ingredients
Main Ingredients
- 1 cup water
- 0.5 cup unsalted butter cut into pieces
- 0.5 tsp kosher salt
- 1 cup all-purpose flour scooped and leveled
- 4 large eggs room temperature
- 1.5 cup sharp cheddar cheese, finely grated about 6 oz
- 2 tbsp fresh chives, finely sliced
- 0.25 tsp ground black pepper
- 0.125 tsp cayenne pepper optional
- 1 large egg beaten with 1 tbsp water for egg wash
Instructions
Preparation Steps
- Preheat oven to 425°F. Line 2 baking sheets with parchment and position racks in the upper and lower thirds.
- In a medium saucepan, bring water, butter, and salt to a boil over medium heat. As soon as the butter melts and the mixture simmers, remove from heat.
- Add flour all at once and stir vigorously with a wooden spoon until no dry spots remain. Return to medium heat and cook, stirring, until the dough pulls away from the pan and a thin film forms on the bottom, about 2 minutes.
- Transfer dough to a bowl and cool 3 to 5 minutes until warm, not hot. Beat in the eggs one at a time, fully incorporating each before adding the next, until the dough is smooth, glossy, and forms a V-shaped ribbon from the spatula.
- Fold in cheddar, chives, black pepper, and cayenne until evenly distributed.
- Scoop tablespoon-size mounds (about 1 inch wide) onto prepared sheets, spacing about 2 inches apart. Alternatively, pipe with a 0.5-inch round tip.
- Lightly brush tops with egg wash. For extra color, sprinkle a pinch of grated cheddar on each puff (optional).
- Bake 10 minutes at 425°F, then reduce oven to 350°F (do not open the door) and bake 15 to 20 minutes more until deeply golden, puffed, and hollow-sounding when tapped.
- Pierce each puff with a skewer to vent steam and return to the oven for 3 to 5 minutes to dry out. Serve warm.
