
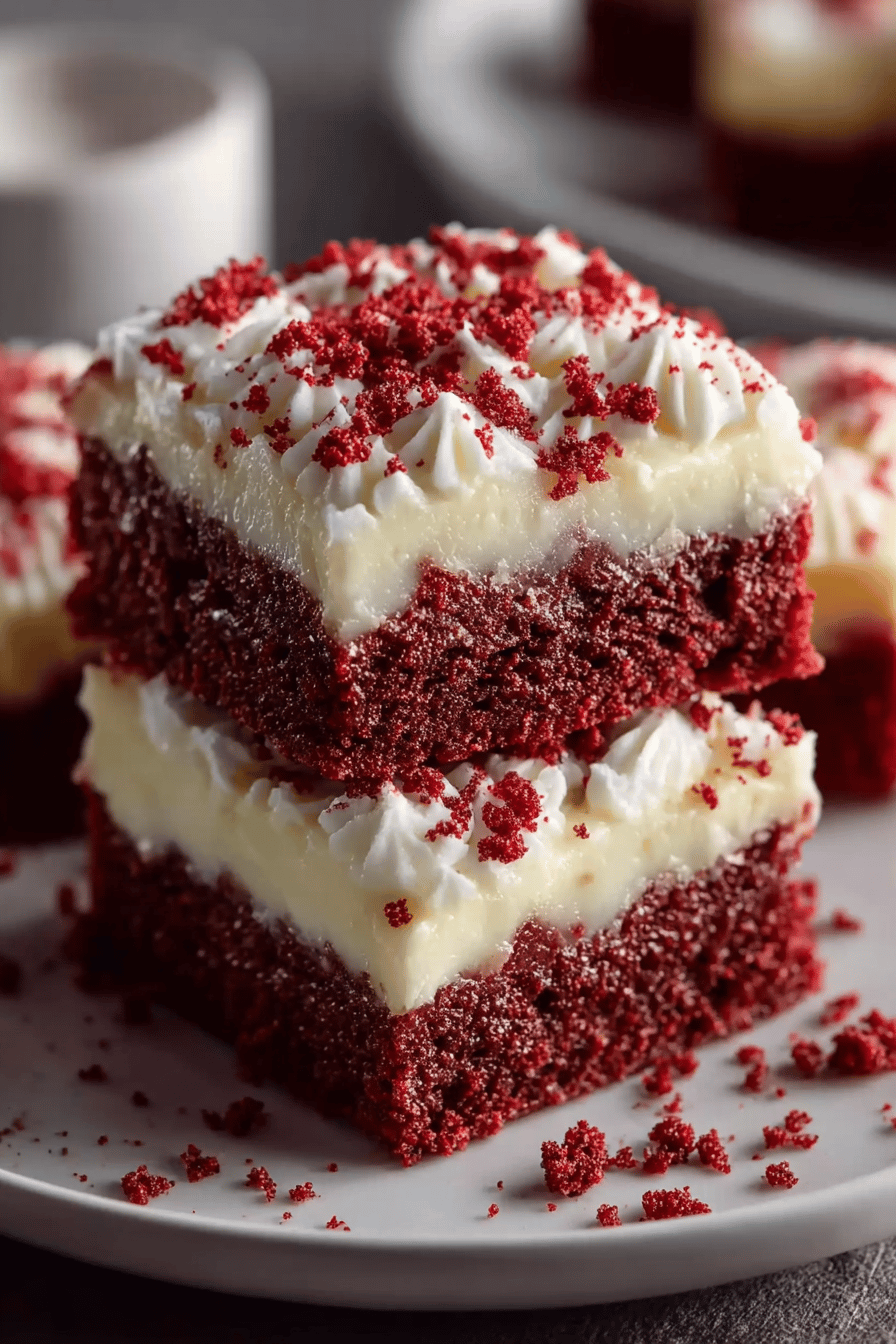
Easy Red Velvet Cookie Bars

These red velvet cookie bars are the move when you need dessert in a hurry and you don’t want to wait on finicky cake layers. They’re soft and chewy like a brownie-meets-sugar-cookie, taste gently cocoa-y, and wear a thick swoop of tangy cream cheese frosting like it’s their job. The color pops (hi, dramatic red!) but the flavor stays cozy and familiar—vanilla, cocoa, a little tang, and a buttery crumb that doesn’t dry out by day two. Honestly, it’s a vibe.
My husband calls these “the red ones” and acts like he can’t remember how to use the dishwasher but can definitely remember how to find a corner piece at 11:37 p.m. Our kiddo licks the frosting off first and then goes back for the bar (chaos, but I respect the strategy). I brought a pan to a neighbor get-together and came home with one lonely square that I ate standing at the counter. We now keep a baggie of the unfrosted bars in the freezer “for emergencies,” which apparently includes Tuesdays.
MORE OF OUR FAVORITE…
Why You’ll Love This Easy Red Velvet Cookie Bars
– Fast. One bowl for wet, one for dry, into the pan, done. No chilling. No drama.
– Chewy edges, soft middle. The best cookie bar personality.
– Cream cheese frosting that tastes like a bakery cake—without the bakery price.
– Uses pantry basics: flour, butter, sugar, cocoa, vanilla, a little vinegar, and food coloring.
– Crowd-pleaser. Bake sales, office treats, “I forgot dessert”—this has you.
How to Make It
Preheat the oven to 350°F and line a 9×13 metal pan with parchment so you can lift the whole slab out. We’re going for soft and chewy, so don’t overbake—think 18 to 22 minutes, tops.
Whisk 1/2 cup melted unsalted butter with 1 cup granulated sugar and 1/2 cup packed brown sugar until it looks glossy and kind of thick. Add 2 large eggs, 2 teaspoons vanilla, 1 tablespoon red food coloring (gel or liquid—use less if it’s crazy strong), and 1 teaspoon white vinegar. It’ll look bright and a little unhinged. Perfect.
In another bowl, whisk 2 cups all-purpose flour, 2 tablespoons natural cocoa powder, 1 teaspoon baking powder, and 1/2 teaspoon fine salt. Fold the dry into the wet—don’t hammer it, just stir until no streaks remain. Toss in 3/4 cup white chocolate chips if you like that sweet pop. The dough is thick; that’s right.
Pat it into the pan (a spatula or damp fingertips help), and bake until the top is set and the center gives just a tiny jiggle but a toothpick hits moist crumbs, not wet batter. Cool completely before frosting, or it’ll slip around and you’ll get mad at me.
For frosting, beat 4 ounces softened cream cheese with 3 tablespoons softened butter, a pinch of salt, 1 teaspoon vanilla, and about 1 1/2 cups powdered sugar until fluffy. If it’s too thick, add 1 to 2 teaspoons milk. Swirl it on, chill 10 minutes for clean cuts, then slice into 16 to 24 bars depending on your mood and the size of your appetite.
Ingredient Notes
This module dynamically pulls in recipe-specific ingredients. Follow this exact bullet styling (HTML bold labels only).
– All-Purpose Flour: Measure with the spoon-and-level method so you don’t pack it in and end up with dry bars. Ask me how I know.
– Unsweetened Cocoa (natural): Just 2 tablespoons—enough for that red velvet whisper of chocolate. Dutch-process works in a pinch but the color turns deeper and the tang is slightly muted.
– Butter: Melted keeps the bars chewy. If it’s hot-hot, it can scramble the eggs—let it cool a few minutes first.
– Brown + Granulated Sugar: Combo equals chewy edges and soft centers. All white sugar makes them crisper; all brown gets a little too dense.
– Eggs: Room temp beats in smoother. If yours are cold, set them in warm water for 5 minutes—done.
– Red Food Coloring: Gel is potent, liquid works fine. Skip entirely if you want “rust velvet.” Flavor is the same.
– White Vinegar: Classic red velvet move for a tiny tang. Lemon juice can sub; don’t skip the acid entirely.
– White Chocolate Chips (optional): Sweet little pops. I’ve also tossed in mini chips or nothing at all—still great.
– Cream Cheese: Full-fat for lush frosting. Low-fat is looser and a bit tangy-sharp—edible, just different.
Recipe Steps
1. Preheat oven to 350°F; line a 9×13 pan with parchment with overhang.
2. Whisk 1/2 cup melted butter, 1 cup sugar, and 1/2 cup brown sugar; whisk in 2 eggs, 2 tsp vanilla, 1 tbsp red food coloring, and 1 tsp white vinegar.
3. Whisk 2 cups flour, 2 tbsp natural cocoa, 1 tsp baking powder, and 1/2 tsp salt; add to wet and stir just until combined.
4. Fold in 3/4 cup white chocolate chips (optional); spread the thick batter evenly in the pan.
5. Bake 18–22 minutes until set on top with moist crumbs on a tester; cool completely in the pan.
6. Beat 4 oz cream cheese, 3 tbsp butter, 1 1/2 cups powdered sugar, 1 tsp vanilla, and a pinch of salt; spread, chill 10 minutes, then slice.
What to Serve It With
– Cold milk or hot coffee—classic.
– A scoop of vanilla ice cream and a sprinkle of crushed freeze-dried strawberries.
– Fresh berries to cut the sweet (raspberries are elite here).
– A little white chocolate drizzle if you’re feeling extra.
Tips & Mistakes
– Don’t overbake. Pull them when the center looks set but still soft; they finish as they cool.
– If your batter looks dry, you probably packed your flour. Add 1–2 teaspoons milk to loosen.
– Too pale? Your coloring is weak—use gel or bump it slightly. Flavor won’t change.
– Line the pan. Parchment overhang means clean lifts and clean cuts.
– Cool before frosting. Warm bars + frosting = slidesville.
Storage Tips
Keep frosted bars covered in the fridge up to 4 days. They taste like fudge when cold, which is not a complaint. For room temp, store unfrosted bars airtight for 2 days; add frosting the day you serve. Freeze slices (unfrosted or frosted, separated with parchment) up to 2 months—thaw in the fridge. Also: yes, these are fantastic with coffee for breakfast. I said what I said.
Variations and Substitutions
– No food coloring: Leave it out or use 1–2 teaspoons beet powder. Color will be muted; flavor is the same.
– Gluten-free: Use a 1:1 gluten-free baking blend with xanthan gum. Check doneness a minute early.
– Dairy-free: Swap vegan butter and vegan cream cheese; or skip frosting and dust with powdered sugar.
– No white chocolate chips: Use dark chips, chopped pecans, or nothing—bars stand on their own.
– Less sweet: Cut granulated sugar to 3/4 cup; keep brown sugar for moisture.
– Maple or honey: Sub up to 1/4 cup of the sugar with maple or honey and reduce bake time by a minute—batter browns faster and is slightly stickier.
Frequently Asked Questions

Easy Red Velvet Cookie Bars
Ingredients
Main Ingredients
- 2 cup all-purpose flour spooned and leveled
- 0.125 cup unsweetened cocoa powder natural, not Dutch-processed
- 0.75 tsp baking soda
- 0.5 tsp fine sea salt
- 0.75 cup unsalted butter melted and slightly cooled
- 1 cup granulated sugar
- 0.5 cup light brown sugar packed
- 2 large eggs room temperature
- 2 tsp vanilla extract
- 1 tsp distilled white vinegar
- 2 tbsp liquid red food coloring add more for deeper color if desired
- 1 cup white chocolate chips plus extra for sprinkling
Instructions
Preparation Steps
- Preheat oven to 350°F. Line a 9×13 inch baking pan with parchment paper, leaving overhang, and lightly grease.
- In a medium bowl, whisk together flour, cocoa powder, baking soda, and salt; set aside.
- In a large bowl, whisk melted butter, granulated sugar, and brown sugar until smooth. Whisk in eggs one at a time, then add vanilla, vinegar, and red food coloring until evenly tinted.
- Add dry ingredients to the wet mixture and fold just until no dry streaks remain. Do not overmix.
- Fold in white chocolate chips and spread the batter evenly into the prepared pan. Sprinkle a few extra chips on top if desired.
- Bake 18 to 22 minutes, or until the edges are set and a toothpick inserted near the center comes out with a few moist crumbs.
- Cool completely in the pan on a rack. Use the parchment to lift out, then slice into 16 bars and serve.