
Delish Red Velvet Brownies

There’s something quietly celebratory about these Delish Red Velvet Brownies — they feel like a little holiday tucked into an ordinary afternoon. They’re not fussy: just velvet-soft, a touch of cocoa that sings against a mild tang, and a crumb that almost melts when you bite into it. I make them when the light slants warm through the kitchen window, when the house smells like coffee and the dog has already claimed his spot under the table. They’re the kind of dessert you can bring to a neighbor, tuck into a lunchbox, or cut into small squares and savor with a slow cup of tea.
I’ll admit, the first time I made them I was a little worried I wouldn’t get that signature tender crumb. You know those days when the kid is asking for a snack, the oven decides to be dramatic, and you can’t find a single measuring spoon? Somehow that chaos made the brownies better — a small victory when the timer finally dinged and my husband peeked in from the garden with flour on his shirt and a grin. He took the first warm piece, closed his eyes, and declared it “the perfect bite.” The kids hovered, toes tapping, so I handed over the slightly imperfect edges — everyone’s favorite part anyway. Our dog sat by the oven, patient and hopeful, and I sipped cold coffee and watched the small, ordinary happiness unfold. That’s why I keep making them: the way they turn a regular afternoon into something a little kinder.
MORE OF OUR FAVORITE…
Why You’ll Love This Delish Red Velvet Brownies
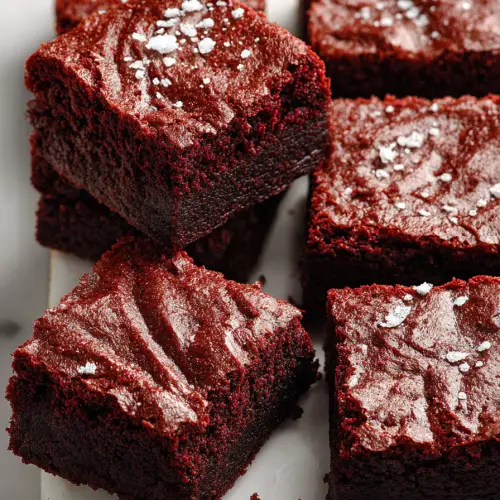
– Texture you’ll come back for: tender, almost silky crumbs that give way with a soft, satisfying chew. They never feel heavy; they feel comforting.
– Gentle cocoa with a soft tang: not overpowering chocolate, but a rounded, warm cocoa note that balances beautifully with a hint of acidity.
– Versatile and forgiving: dress them up for company or slice them small for snacks. They travel well and last nicely through a busy week.
– Warm kitchen memory: they smell like a hug — cocoa, vanilla, and that baker’s warmth — which makes making them feel like a small ritual.
– Kid-approved and grown-up loved: they’re sweet enough to delight little ones but nuanced enough that the adults linger over the last square.
Slow Moments
I like to make these on a day that isn’t trying to be anything but gentle. The radio plays low — maybe old soul music or a quiet indie playlist — and the house is at that sweet spot between too busy and too quiet. I set a mug of coffee nearby and forget about it for a while; when I remember, it’s half cold and perfect, because the brownies deserve my full attention. There’s a kind of meditation in watching batter glossy and smooth under a wooden spoon, in licking the spoon with abandon when no one’s watching, in closing the oven and letting the warm hush take over.
Sometimes my son will pop in and demand to stir “just once,” which always becomes three times and then a sneaky taste. He takes his job very seriously, wearing an apron that’s now missing one of its strings. My husband tends to the timing rituals — the three-minute countdowns, the exaggerated sniff test when the smell gets strong — and our dog paces loyally, convinced a crumb will fall. The waiting is part of it; we fill those minutes with bits of conversation that would otherwise slip away, and by the time the brownies cool, we’ve traded recipes, small plans, and silly jokes.
Time-Saving Hacks
– Use a stand mixer or a sturdy whisk if you’re short on hands — it shortens the mixing time and makes cleanup gentler.
– If you don’t have a full hour, make the batter and keep it covered in the fridge for a day; when you bake it fresh, the result still feels homemade and spontaneous.
– Line your pan with parchment the night before; then in the morning you’ll slide the whole slab out without fuss.
– To speed cooling, set the pan on a wire rack near an open window or a cool corner of the counter, and slice gently with a warm knife. A quicker slice means less crumbling and a tidier plate.
– Remember: slowing down a minute to stir properly or scrape the bowl actually improves texture — patience is a useful shortcut.
Serving Ideas
– For a weekday treat, cut small squares and pair with a mug of coffee or plain yogurt for contrast — simple, comforting, and kid-friendly.
– For a weekend brunch, serve slightly warmed with a scoop of vanilla ice cream or a dollop of whipped cream, and sprinkle a few toasted nuts for a little crunch.
– Dress them up for guests: dust with a fine sift of cocoa or powdered sugar, and serve on a wooden board with fresh berries.
– Leftovers become delightful when paired with mid-morning tea, or tucked into a lunchbox with a note — the kind that says, “This is for later. Love.”
– Keep it casual for cozy nights in: warm a slice and pair with a steaming mug of chai or cocoa for an easy, indulgent moment.
Tips & Mistakes
I once forgot to preheat the oven and tried to pretend it would be fine. The brownies took longer and came out denser — a gentle reminder that small steps matter. If you overmix, they’ll become too tight; if you underbake, they’ll be too soft to slice neatly. Trust the smell and the edges: when they pull away a touch from the pan and the kitchen smells like cocoa and warm sugar, you’re close. I find that letting them cool properly makes a huge difference in texture. Also, don’t stress the imperfect edges — they’re usually the best part and will save you from any lingering disappointment.
Storage Tips
Leftovers keep beautifully at room temperature in an airtight container for a couple of days, which is perfect when the week gets busy. For longer life, tuck them in the fridge for up to a week; bring a slice to room temp before serving or warm it gently for that fresh-baked feeling. I love one warmed square with my morning coffee the next day — the crumbs are even more tender and the flavors have settled into a cozy harmony. You can freeze slices between parchment layers for up to two months; thaw in the fridge overnight and warm briefly before serving.
Variations and Substitutions
I’ve experimented gently: a little orange zest adds a bright note that cuts through the richness; a handful of finely chopped nuts gives a welcome crunch; a swirl of cream cheese before baking feels indulgent and lovely. I’ve also tried a touch less sugar when the fruit I’m serving alongside is very sweet — it balances nicely. If you want to lighten things up, swap part of the butter with applesauce for a softer crumb, though the flavor will shift a bit. I avoided using dense flours in a hurry once; the result was grainy, so stick to softer flours if you can, or test a small batch first.

Frequently Asked Questions
Delish Red Velvet Brownies
Ingredients
Main Ingredients
- 1.5 cups all-purpose flour
- 1 cup granulated sugar
- 0.25 cups cocoa powder
- 1 cup butter melted
- 2 large eggs
- 1 tbsp red food coloring
- 1 tsp vanilla extract
- 1 cup cream cheese softened
- 0.5 cups powdered sugar
Instructions
Preparation Steps
- Preheat the oven to 350°F (175°C). Grease a 9x13 inch baking pan.
- In a large bowl, mix the melted butter, granulated sugar, and cocoa powder until well combined.
- Add the eggs, red food coloring, and vanilla extract. Mix until smooth.
- Gradually add the flour and mix until just combined.
- Pour the batter into the prepared baking pan and smooth the top.
- Bake for 30 minutes or until a toothpick inserted comes out clean.
- While the brownies are baking, beat the cream cheese and powdered sugar until smooth.
- Once the brownies are cooled, spread the cream cheese mixture on top.