
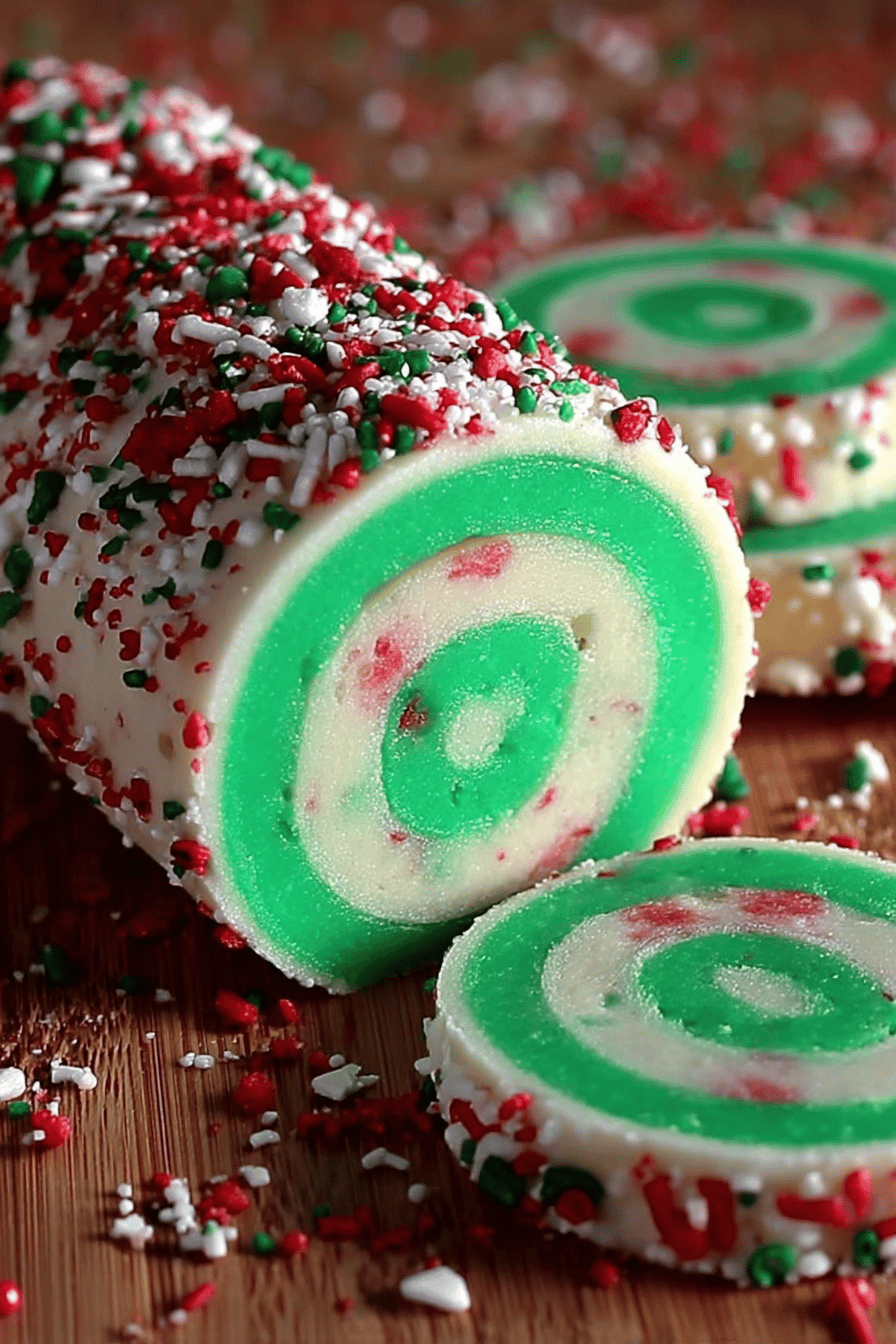
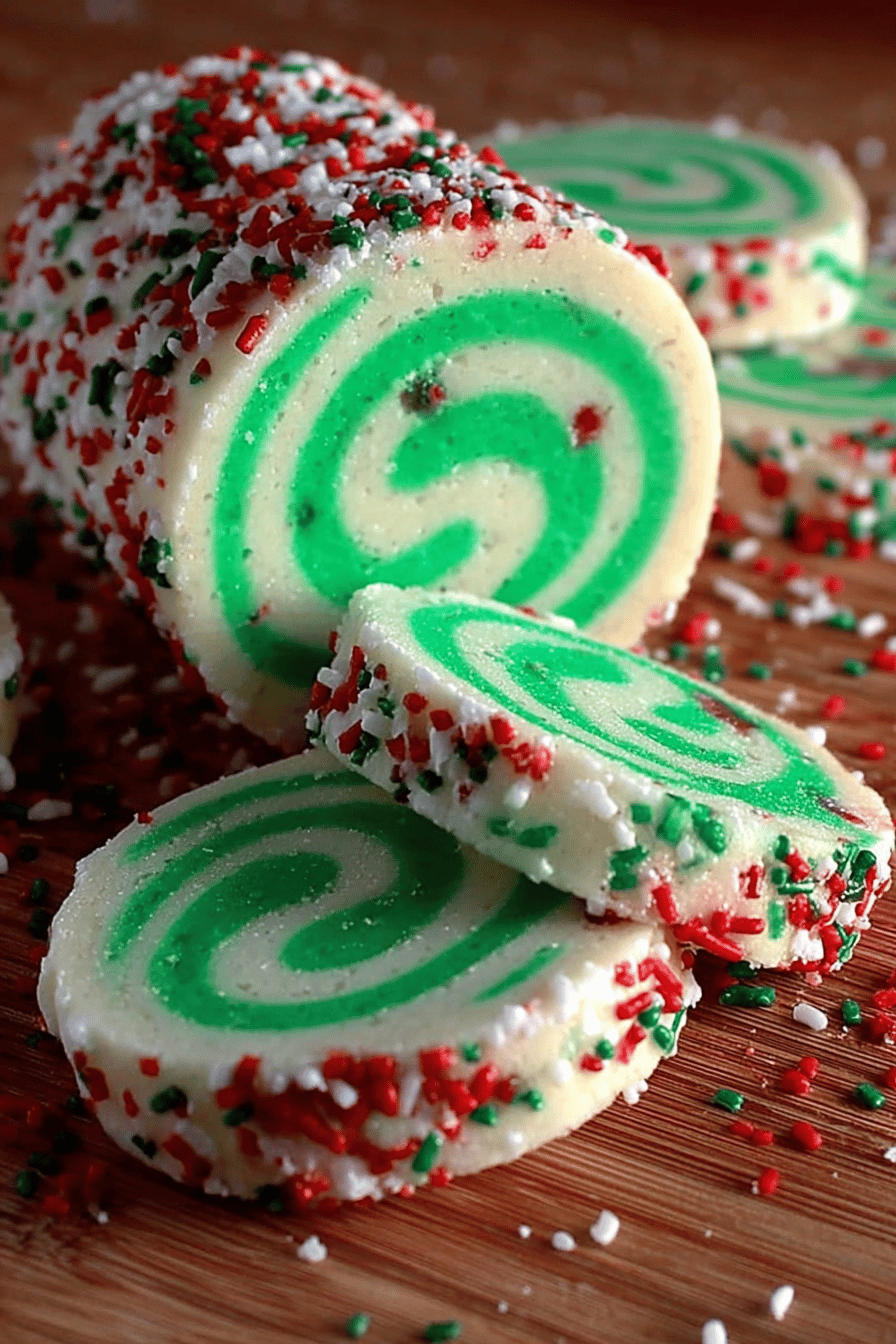
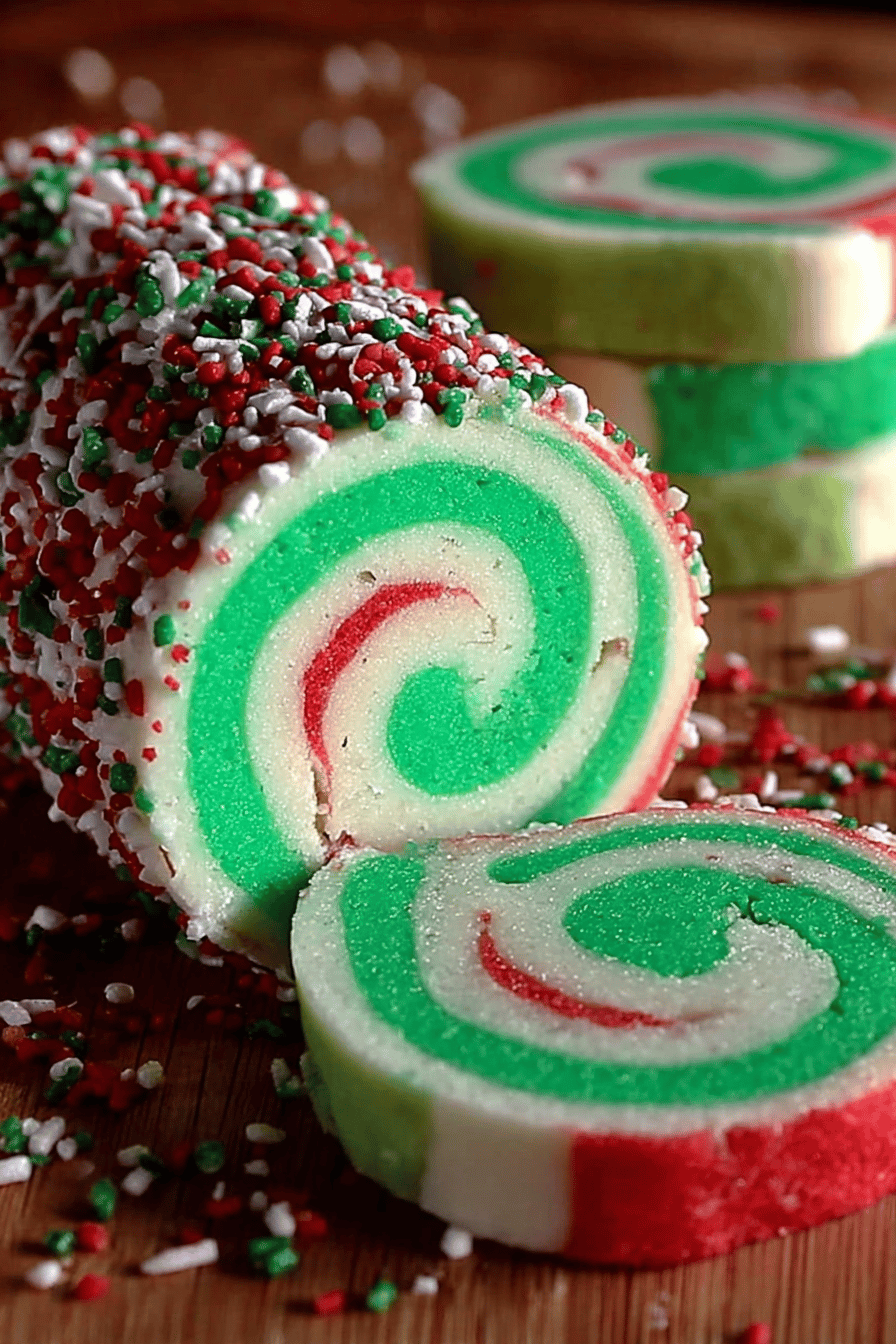
Christmas Pinwheel Cookies Recipe
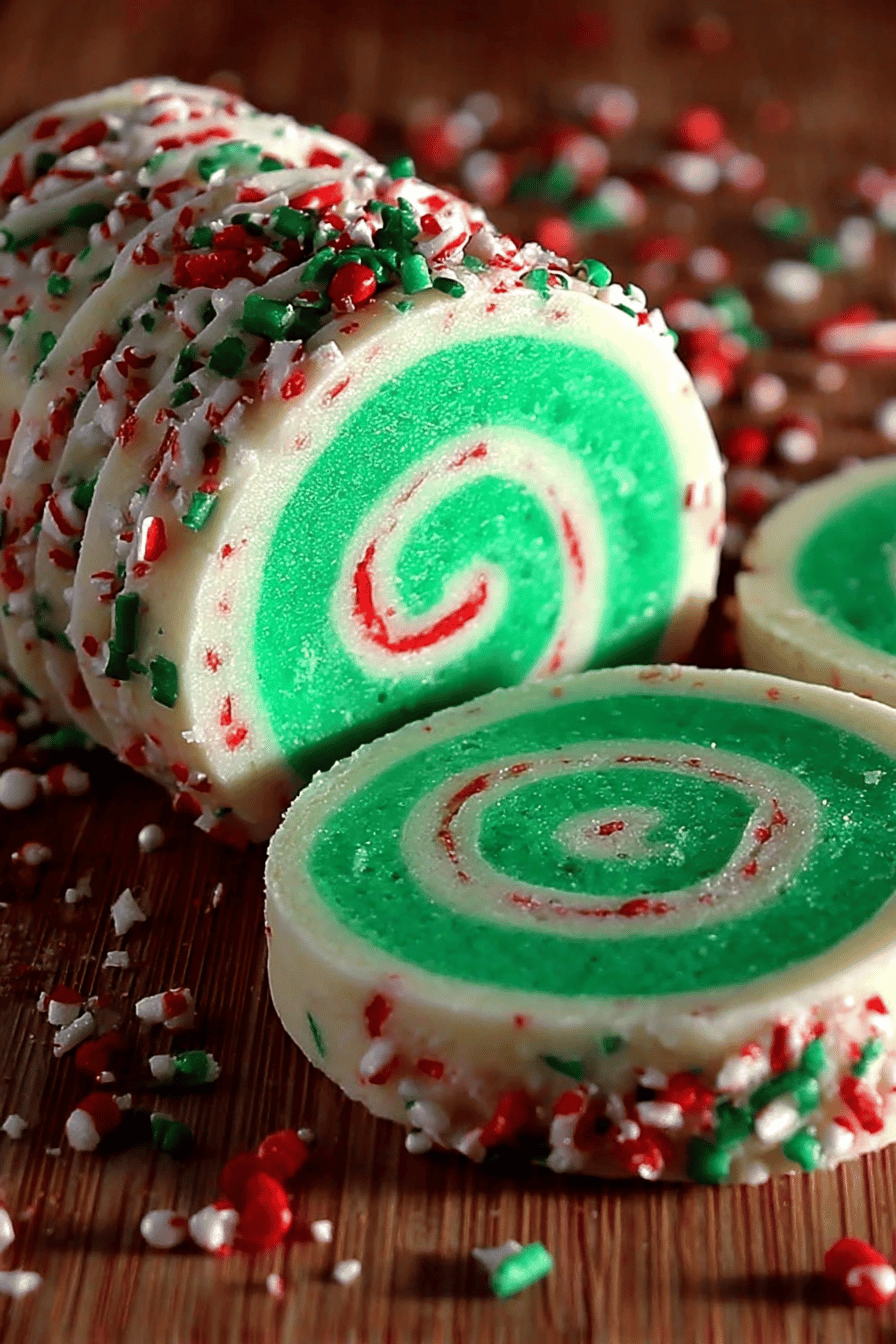
Okay, friends, gather ‘round because I’m about to share a recipe that’s basically edible holiday. Buttery, tender cookies swirled with vibrant red and green, all dressed up with a sweet glaze. Christmas Pinwheel Cookies aren’t just cookies. They are a great way to make them. What are some of the best little bursts of festive cheer that make every bite feel like a celebration? What makes sugar cookies so good? If you can roll out dough and spread a little jam, you’ve got this.
MORE OF OUR FAVORITE…
- Cranberry Christmas Cake Recipe
- Christmas Fudge Recipe Delight: Indulge in Holiday Sweetness
- Quick and Easy 15-Minute Beefy Noodle Skillet Recipe
- Crustless Pizza Delight A Unique Take on Classic Flavors
- Loaded Greek Chicken Avocado Salad Recipe A Flavorful Chicken and Avocado Salad Combination
- Roasted Cauliflower Salad Recipe with Lemon Tahini Dressing
What is the best Christmas pinwheel cookie recipe?
What’s a sugar cookie? What is a pinwheel cookie recipe for Christmas? How do I make pinwheels before baking? What makes them so eye-catching is the swirling effect. Is this a delicious combination of buttery cookie goodness and visual treat, perfect for Valentine’s Day? How do I spread holiday joy? What’s so cool is the design makes them look like you spent hours in the kitchen, when it actually is. What is the best way to prepare for a wedding?
Why you’ll love this recipe?
How do I make these cookies? What are the best Christmas pinwheel cookies recipe?
- Flavor Explosion:The buttery, slightly vanilla-y dough paired with the hint of almond extract is just divine. I’ve even experimented with a touch of lemon zest in the dough and the resulting flavor is amazing.
- SurprisinglyDon’t let the fancy swirls intimidate you. This recipe is surprisingly easy to execute, even for beginner bakers. What I love most about baking is that the kids can help, which always makes baking feel like a true joy.
- Budget-Friendly BakYou probably already have most of the ingredients in your pantry. What are flour, sugar, butter, eggs?
- Is Versatility the key toChristmas cookies are perfect for parties, cookie exchanges, or just a cozy night in with friends. What is hot cocoa? Can you customize the colors and flavors to match any holiday or theme? I’ve even used different food color gels to adapt them for birthdays.
What are some of the best Christmas pinwheel cookie recipes? Is this the holiday version of sugar cookies?
How do I make pinwheel cookies?
Quick Overview
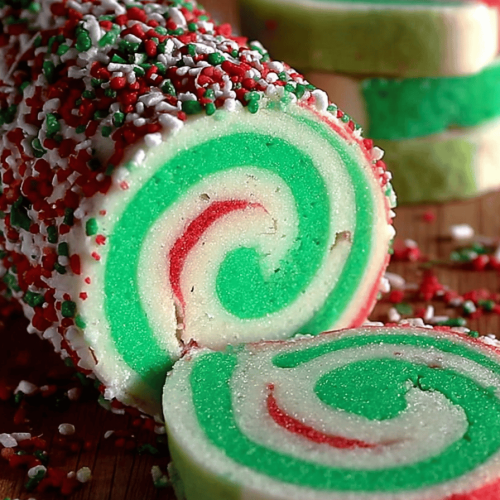
Alright, here’s the gist of it: “Alright You’ll make two batches of dough, tint one red and one green, layer them, roll them into a log, and cut into 1 inch squares. How do I make a simple glaze? What is the chilling part? How do you keep cookies crisp in the oven? Is it intimidating? What are some of the best cookies you’ve ever made?
Ingredients Notes:
For the Main Batter:
- All-Purpose Flour: This forms the base of the cookie. Make sure to measure it accurately! I always use the spoon and level method to avoid packing it in.
- Unsalted Butter: It should be softened but still cool to the touch. This ensures it creams properly with the sugar.
- Granulated Sugar: For sweetness and texture.
- Eggs: They bind the dough and add richness.
- Vanilla Extract: For that classic cookie flavor. I always splurge on good quality vanilla. Can you taste the difference?
- Almond Extract: Just a touch enhances the overall flavor and adds oozing aroma.
- Salt: Balances sweetness and enhances the other flavors.
For the Coloring:
- Gel Food Coloring: What is the best I highly recommend using gel food coloring because it’s more concentrated and won’t affect the color of the food. How do I make dough like liquid food coloring can. Red and green are classics for Christmas, but feel free to get creative!
For the Glaze:
- Powdered Sugar: For a sweet and smooth glaze.
- Milk: A little bit to thin out the glaze. You can also use cream for a richer glaze I actually prefer almond milk because it makes it even creamier!
- Vanilla Extract: A touch of vanilla enhances the glaze.
What are the Step-
Step 1: Preheat & Prep Pan
Preheat your oven to 375°F (190°C). Line a baking sheet with parchment paper. How do I clean cookies? I always do this first so the oven is ready when the dough is.
Step 2: Cream Butter and Sugar
In a large bowl, cream together the softened butter and granulated sugar until light and fluffy. Set aside. What is the best way to make a pale and airy mixture with an electric mixer? This step is important for creating a tender cookie.
Step 3: Add Eggs and Extracts
Beat the eggs one at a time, then stir in the vanilla extract and almond extract. Make sure to scrape down the sides of the bowl to ensure everything is evenly incorporated. If your eggs are cold, warm them in hot water for a couple minutes. How do you make butter seize up?
Step 4: Gradually Add Dry Ingredients
In a separate bowl, whisk together the flour and salt. Set aside. Gradually add the dry ingredients to the wet ingredients, mixing until just combined. Do not over mix cookies, as this can result in hard cookies. I usually stop mixing when there are still some streaks of flour and then finish it by hand.
Step 5: Divide Dough and Color
In a bowl, combine red food coloring and water. Mix until smooth. Divide dough in half. In the other bowl, add green food coloring and mix until evenly colored. How do you use gel food coloring to avoid dough getting wet.
Step 6: Chill Dough
Wrap each colored dough in plastic wrap and chill in the refrigerator for at least 1 hour. How do you roll out cookies? I always chill mine for at least two hours, or even overnight if I have the time.
Step 7: Roll Out Dough
On a lightly floured surface, roll out each dough into 9×12 inch rectangle. Is it necessary to use a rolling pin to make the rectangles even? If the dough is too soft, pop it back into the refrigerator for a few minutes.
Step 8: Layer and Roll Up
How do I place a red dough rectangle on top of ‘green dough’? Trim the edges to make them even. Starting from one long edge, tightly roll up the dough into a log. Wrap the log in plastic wrap and chill in the refrigerator for another 30 minutes.
Step 9: Slice and Bake
Preheat oven to 375 degrees. Use a sharp knife to slice the log into 14-inch thick rounds. Place the slices on the prepared baking sheet, leaving a little space between each cookie. Bake for 8-10 minutes, or until the edges are lightly golden brown. I always keep a close eye on them because they can burn quickly. Don’t overbake!
Step 10: Cool and Glaze
Let the cookies cool on the baking sheet for a few minutes before transferring them to a wire rack to cool completely. While the cookies are cooling, prepare the glaze by whisking together the powdered sugar, milk, and vanilla extract until smooth. Drizzle the glaze over the cooled cookies. Let the glaze set before serving.
What to Serve It With
These cookies are fantastic on their own, but here are some ideas to make them extra special:
For Breakfast: Pair them with a strong cup of coffee or a latte. They’re also great with a side of fresh fruit, like berries or sliced oranges. Set out a beautiful coffee bar and let people help themselves.
For Brunch: Arrange the cookies on a tiered serving platter with other holiday treats, like mini quiches and scones. Serve with mimosas or sparkling cider for a festive touch. These look beautiful on the table!
As Dessert: Serve them after a holiday dinner with a scoop of vanilla ice cream or a dollop of whipped cream. A drizzle of chocolate sauce adds a decadent touch. The cookies look gorgeous on a dessert buffet!
For Cozy Snacks: Enjoy them with a mug of hot cocoa or spiced cider on a cold winter night. These are perfect for movie night.
My family always has a plate of these cookies out during the holidays, so we can grab them anytime we want. They’re also great for packing in lunchboxes or taking to work.
Top Tips for Perfecting Your Christmas Pinwheel Cookies Recipe
Here are my tried-and-true tips for making the best Christmas Pinwheel Cookies Recipe:
- Chill the dough: Chilling the dough is crucial for preventing the cookies from spreading too much in the oven. I recommend chilling it for at least 1 hour, but longer is even better.
- Don’t overmix: Overmixing the dough can result in tough cookies. Mix until just combined.
- Use gel food coloring: Gel food coloring is more concentrated than liquid food coloring, so it won’t affect the consistency of the dough.
- Roll the dough evenly: Try to roll the dough into even rectangles so the cookies have a uniform appearance.
- Slice the cookies evenly: Use a sharp knife to slice the log into even slices. If the log is too soft, chill it in the freezer for a few minutes before slicing.
- Don’t overbake: Overbaking the cookies can make them dry and crumbly. Bake until the edges are lightly golden brown.
- Let the cookies cool completely before glazing: If you glaze the cookies while they’re still warm, the glaze will melt and run off.
- Get creative with the colors: Feel free to use different colors of food coloring to match any holiday or theme. I’ve made pink and blue cookies for baby showers and rainbow cookies for birthdays.
- Add flavoring: You can add different extracts or spices to the dough to customize the flavor. Try adding peppermint extract for a Christmas flavor or lemon zest for a spring flavor.
One time, I forgot to chill the dough long enough, and the cookies spread all over the baking sheet. It was a disaster! Learn from my mistakes and be patient.
Storing and Reheating Tips
Here’s how to keep your cookies fresh and delicious:
Room Temperature: Store the cookies in an airtight container at room temperature for up to 3 days. They’re best if you eat them quickly.
Refrigerator Storage: Store the cookies in an airtight container in the refrigerator for up to 1 week. Bring them to room temperature before serving.
Freezer Instructions: Freeze the cookies in an airtight container for up to 2 months. Thaw them at room temperature before serving. I like to freeze them unglazed, then add the glaze after thawing.
Glaze Timing Advice: If you’re planning to freeze the cookies, it’s best to wait to glaze them until after they’ve been thawed. This will prevent the glaze from becoming sticky or running.
I like to store mine in a cookie jar on the counter, so everyone can grab them easily. They never last long!
Frequently Asked Questions
Final Thoughts
So, there you have it! My foolproof Christmas Pinwheel Cookies Recipe that’s sure to become a holiday tradition. They’re not only beautiful and festive but also incredibly delicious and surprisingly easy to make. I promise, everyone will be so impressed with your baking skills! If you love these cookies, be sure to check out my other holiday cookie recipes, like my gingerbread cookies and peanut butter blossoms. Happy baking, friends! I can’t wait to hear how yours turn out! Leave a comment below and let me know if you make them, what kind of variations you added, and how many batches you had to make! Sharing is caring!
Christmas Pinwheel Cookies Recipe
Ingredients
Main Ingredients
- 3 cups all-purpose flour
- 1 teaspoon baking powder
- 0.25 teaspoon salt
- 1 cup unsalted butter softened
- 1.33 cups granulated sugar
- 2 large eggs
- 2 teaspoons vanilla extract
- 0.5 teaspoon red food coloring gel-based
- 0.5 teaspoon green food coloring gel-based
Instructions
Preparation Steps
- In a medium bowl, whisk together the flour, baking powder, and salt.
- In a large bowl, beat the butter and sugar until light and fluffy. Add the eggs, one at a time, beating well after each addition. Stir in the vanilla extract.
- Gradually add the dry ingredients to the wet ingredients, mixing until just combined.
- Divide the dough into two equal parts. Tint one part with red food coloring and the other part with green food coloring, kneading until the color is evenly distributed.
- Roll each colored dough into an 8x8 inch square. Place the green dough on top of the red dough and roll up tightly to form a log. Wrap the log in plastic wrap and refrigerate for at least 1 hour.
- Preheat the oven to 350°F (175°C). Slice the chilled dough log into 1/4 inch slices and place on a baking sheet lined with parchment paper.
- Bake in the preheated oven for 10-12 minutes, or until the edges are just starting to brown. Cool on a wire rack.